
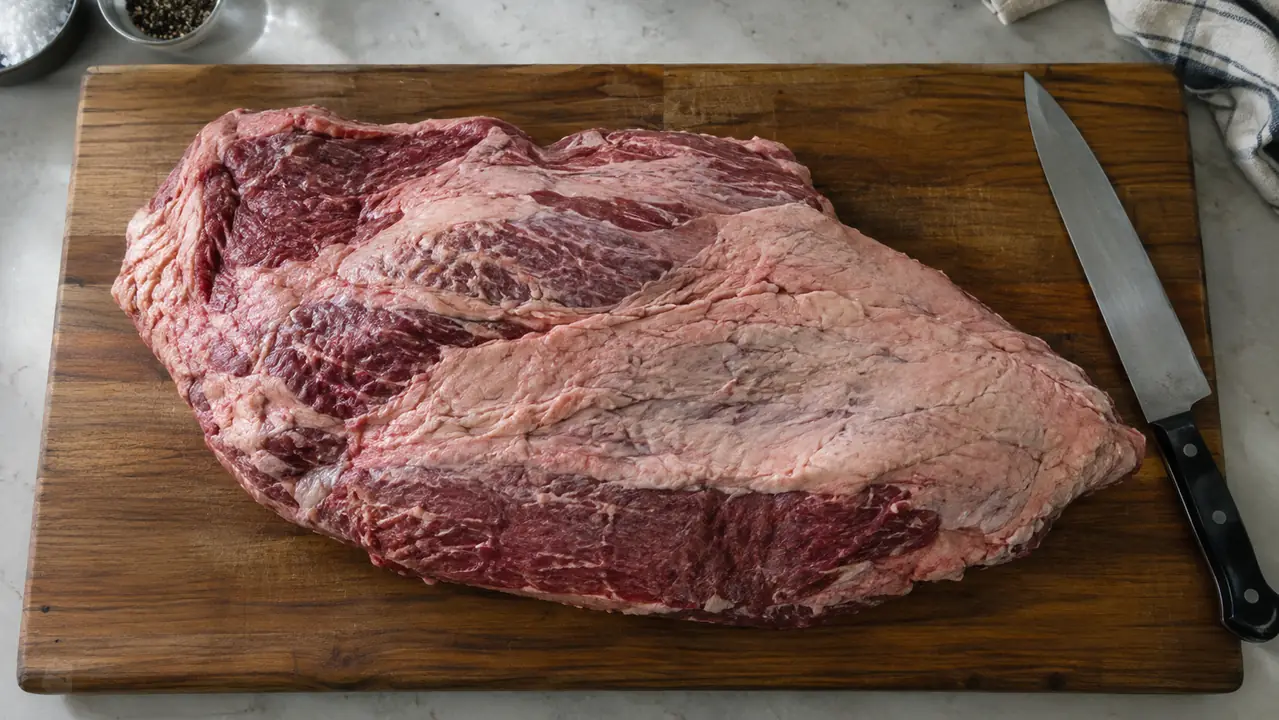
A whole packer brisket is the one cut that still makes me stop and pay attention after thirty years of cooking, and it is the one cut that sends most home cooks straight to the butcher to ask for it pre-trimmed. I get it. The thing arrives looking like a slab of raw meat with a map of fat on top, and the first question is always where do I even start. The answer is simpler than the grocery store display makes it look. You separate the point from the flat, you trim the hard fat, you square the edges, and you do all of it with a knife that does not fold under pressure. I have broken down more packer briskets than I can count in my own kitchen, and the knife I reach for every time is a COOLINA butcher knife from the Meat Lover set. Let me walk you through the whole process step by step.
Before we get into the cuts, let me be direct about the tool. A brisket is not a delicate piece of meat. It has a thick fat cap, a hard seam of fat between the two muscles, and silver skin in places. A flimsy kitchen knife will fight you the whole way, and a dull one is genuinely dangerous because you end up pushing harder than you should. A proper butcher knife is hand-forged high-carbon steel, holds an edge through a whole brisket, and has enough blade weight that the knife does the work instead of your wrist. If you are going to buy one serious knife for big cuts of meat, buy a butcher knife and buy it once.
Break down a whole brisket without fighting the blade
The COOLINA Meat Lover 4-Knife Set includes a butcher knife that handles the fat cap, the point-to-flat seam, and the silver skin without constant resharpening. Hand-forged high-carbon steel, full tang, and a grip that stays put when your hands are slick.
Amazon Check Today's Price on Amazon →Step 1: Set Up Your Board and Know the Anatomy
Put the brisket on a large wooden cutting board with a groove if you have one. You are going to produce a fair amount of liquid and fat, and the groove keeps it from running onto the counter. Have a couple of clean kitchen towels within reach, one dry for grip and one damp for wiping the blade. You also want a trash bowl or a sheet of butcher paper for the fat you trim off.
Take a minute to look at what you are working with. A whole packer brisket has two muscles. The flat is the long, lean, rectangular piece that sits on the bottom. The point is the thicker, fattier piece that sits on top at one end, like a cap. Between them is a hard seam of fat that runs the length of the meat. The fat cap on top can be anywhere from a quarter inch to over an inch thick. Understanding that layout before you cut is what keeps you from accidentally slicing into the flat when you are trying to separate the two muscles.
One more thing before the first cut: let the brisket sit at room temperature for about thirty minutes. Cold fat is hard and slippery, and warm fat gives way cleanly. This is not a food safety issue for a short window like that, it just makes the knife work easier. Set your COOLINA butcher knife on the board next to you and get comfortable. You will be standing over this for a while.
Step 2: Trim the Fat Cap to a Uniform Thickness
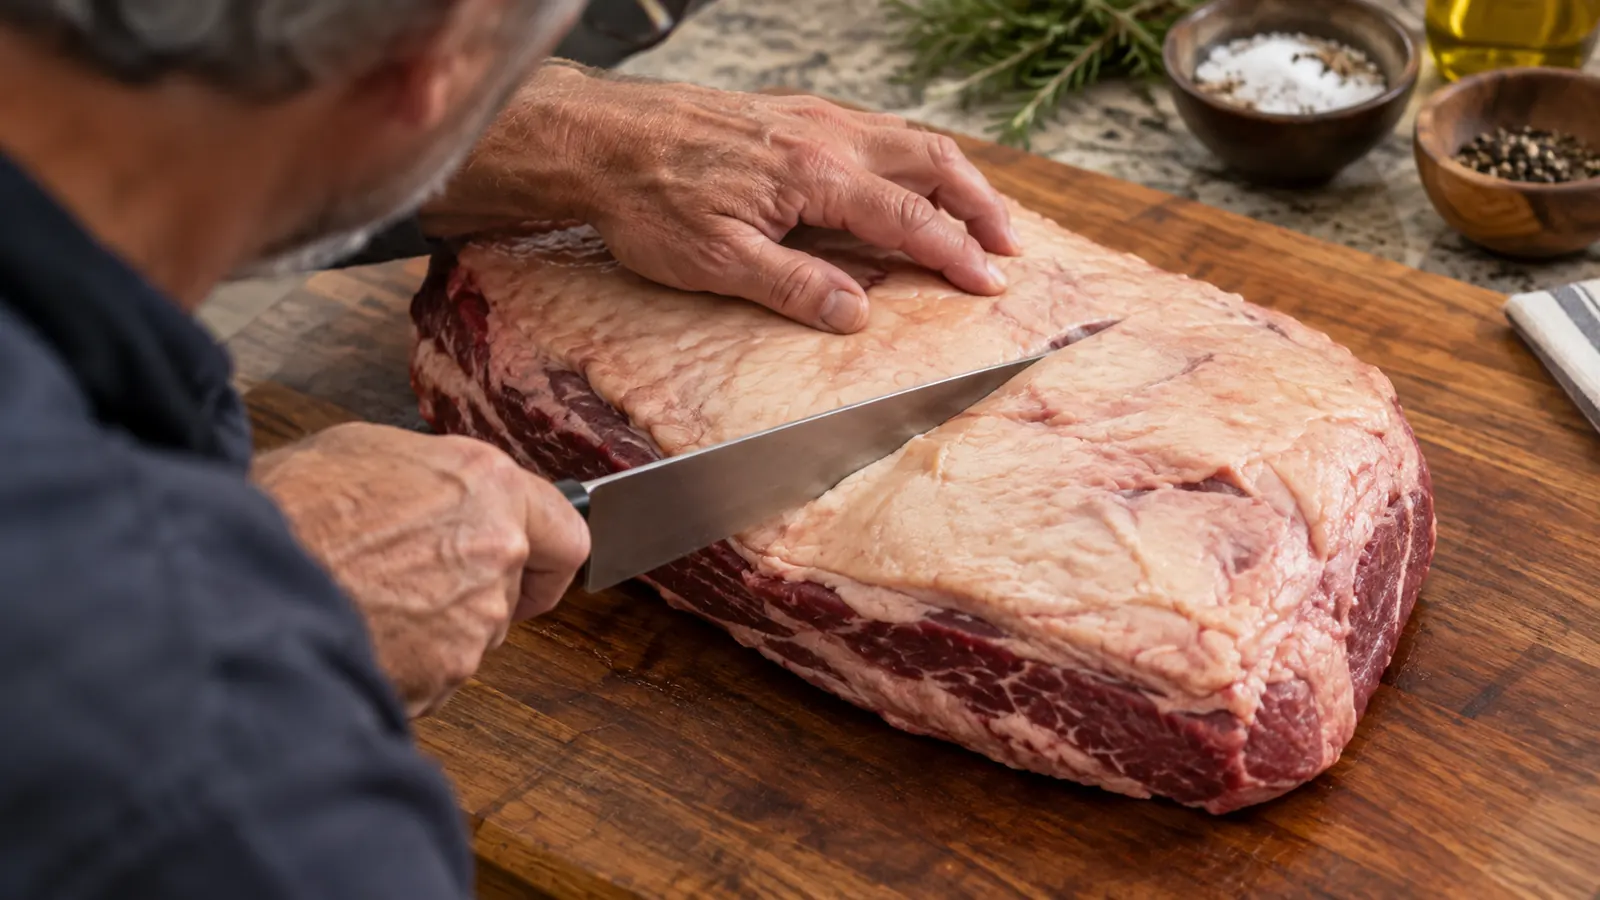
Start with the fat cap. You are not trying to remove it all. You are trying to get it down to a uniform quarter inch or so across the whole top of the brisket. That even layer renders down during a long cook and keeps the meat moist. Leave it too thick and you end up with big chewy slabs of unrendered fat. Cut it too thin and the flat dries out before the point is done.
Use long, horizontal strokes with the blade angled slightly away from the meat. Grip the fat cap with your free hand and pull it taut, then slice under it in smooth sweeps. The COOLINA butcher knife has enough blade length that you can cover a lot of ground in one pass, and the high-carbon steel stays sharp enough that you are slicing rather than sawing. Sawing is what turns a clean trim into a ragged mess.
Work in sections and check your thickness as you go. Lay the blade flat against the meat to gauge where you are. When you hit a spot where the fat dips thin, stop there and move to the next section. You are not grading the brisket. You are just making it uniform so it cooks evenly. The fat you trim off goes into the trash bowl. Do not throw it out if you smoke meat, by the way. That trimmings pile is exactly what you grind into tallow for your next cook.
Step 3: Separate the Point from the Flat
This is the step that looks intimidating and is actually the most forgiving. Turn the brisket so the point is on your left if you are right-handed, or on your right if you are left-handed. Find the seam where the point muscle meets the flat. It is visible as a natural line in the meat, usually with a thick band of fat running along it.
Cut down into that seam with the tip of your butcher knife and follow the fat line. The two muscles are not fused together. They are connected by fat, and once you open the seam, the point will start to pull away from the flat on its own. Work the blade along the seam, using short slicing motions and letting the weight of the knife do the work. Do not force it. If you hit resistance, you are probably cutting into one of the muscles. Back up and find the fat again.
When the point comes free, you will have two pieces: the lean flat and the thick, fatty point. Both are worth keeping. The flat is your classic slicing brisket. The point is what you cube up for burnt ends or leave whole for a second cook. Set the point aside and go back to the flat for the next step.

Step 4: Trim the Hard Fat Seam and Silver Skin
Now that the two muscles are separated, you can see the hard fat seam that was between them. It is the dense, waxy fat that never renders, and it needs to go. Run your knife flat along the surface of the flat muscle and slice the seam off in one or two long passes. You will know you are at the right depth when you see clean red meat underneath.
The silver skin is the thin, shiny membrane on parts of the brisket. It does not break down during cooking, it shrinks and gets chewy. To remove it, slide the tip of the blade under the edge of the membrane, lift it slightly, and angle the blade up as you push forward. The COOLINA butcher knife is stiff enough that the blade does not flex away from the membrane, which is the thing that makes this step frustrating with a flimsy knife.
Do not obsess over getting every last bit of silver skin. A few small patches will not ruin a brisket. What matters is removing the big sheets and the hard fat seam, because those are the parts that make slices chewy and uneven. Ten minutes of careful trimming here saves you a lot of disappointment at the cutting board later.
Step 5: Square the Edges and Portion the Flat
The last step is the one that makes your brisket look like it came from a shop. Square the edges of the flat by trimming off the thin, ragged pieces that hang off the sides. Those thin pieces cook faster than the main muscle and end up dried out, so cutting them off gives you a more uniform piece that cooks evenly end to end. Save the trimmings. They are great for chili or for grinding into burgers.
If you are cooking for a smaller crowd, now is the time to portion the flat. Cut it into two or three even roasts across the grain. That gives you the option to cook one piece now and freeze the rest. Use a clean, sharp edge on your COOLINA butcher knife and make one smooth stroke per slice rather than sawing back and forth. Sawing shreds the surface and makes the cooked slices less clean.
Wrap the portions you are not cooking immediately in butcher paper or vacuum seal them, then refrigerate or freeze. Label them with the cut and the date. A properly trimmed and portioned brisket is one of the best things to have in the freezer, because it goes straight from frozen into a smoker or a slow cooker with no extra work.
What Else Helps
A good butcher knife is the main tool, but a few other things make the job easier. A wooden cutting board with a juice groove keeps the mess contained. A pair of heavy kitchen shears handles any small bits of connective tissue that the knife does not need to bother with. And a steel or ceramic honing rod is worth having nearby, because touching up the edge halfway through a big trim keeps the blade working like it did at the start. The COOLINA Meat Lover set includes a honing rod, which is one of the reasons I reach for it when I know a big piece of meat is coming home.
I will also say this: do not rush the trim. The first time I broke down a whole brisket at home, I was in a hurry and I cut too deep into the flat trying to separate the point. The brisket still cooked fine, but the slices were uneven and a good chunk of the flat was thinner than I wanted. Now I budget twenty minutes for the whole job and I do not try to speed through it. The knife does the work, and the work takes the time it takes.
After the trim, wash the knife by hand, dry it immediately, and give it a light coat of oil if you are storing it for a while. High-carbon steel takes an edge better than stainless, but it will also darken if you leave it wet. Five minutes of care after the cook keeps the blade ready for the next brisket.
One more thing: a mesh glove on your non-knife hand is cheap insurance. When you are pulling fat taut and slicing toward your hand, the glove lets you grip harder without worrying about the blade. I did not use one for years and I was lucky. Now I wear one for any big trim.
Also, keep a separate cutting board for raw meat if you can. Wood is fine, but it needs a good scrub with hot soapy water after a brisket trim, and a plastic board that goes in the dishwasher is easier to keep clean. I use a big wooden board for the trim itself and switch to a plastic board if I am portioning cooked meat later.
The seam between the point and the flat is fat, not bone. Follow the fat and the two muscles separate on their own.
One solid butcher knife beats a drawer full of dull ones
The COOLINA Meat Lover 4-Knife Set gives you a hand-forged high-carbon butcher knife that powers through a whole packer brisket, plus the utility blades you will reach for every other day in the kitchen. No flex, no fighting the blade, no resharpening mid-trim.
Amazon Check Today's Price on Amazon →