

I own three skillets that see regular use, and the one I reach for most had a rough first month. It arrived pre-seasoned from Lodge, I cooked on it twice, then I ran it through the dishwasher exactly once and spent the next week scrubbing rust out of a 12-inch pan I had just bought. None of it was the pan's fault. Cast iron is close to indestructible. The seasoning on it, that baked-on layer of oil that does the actual non-stick work, is the only fragile part. This is the season-and-clean routine I have lived with for years, written down the way I needed it the first time, with the numbers that matter.
Short version before the details: scrape it clean while it is warm, rinse it with hot water, dry it completely on the burner, rub on a paper-thin coat of oil, and heat it just past the oil's smoke point. That is the whole job. It takes about five minutes on a busy night and an hour on a weekend when you want a fresh layer. Do it on a steady rhythm and a Lodge skillet like this one graduates from sticky to sure-fire faster than people expect, because the pre-season from the factory gives you a real head start.
The Pan That Starts Halfway There
The Lodge 12-inch arrives pre-seasoned with vegetable oil and a silicone handle holder in the box, so you are not starting from bare metal the way you would with the bargain finds. Season it properly a few times and it becomes the most reliable pan in the kitchen, the one you pull down first. Check the current price before you buy.
Amazon Check Today's Price on Amazon →Step 1: Clean It While It's Warm, and Never Soak It
Right after dinner, while the pan is still warm but not scorching, scrape out the loose food with a flat metal spatula or a chainmail scrubber. Lodge sells both, and honestly a plain metal spatula does the job. If something is welded on, add a splash of water and let it steam for ten seconds, then scrape again. The food lifts before the seasoning does, and that order matters. It is the whole trick behind a pan that never needs more than the basic routine.
Rinse it under hot tap water. You do not need dish soap on a normal night, and you never, ever put cast iron in the dishwasher. The detergent and the long soak cycle strip the seasoning faster than anything else in a kitchen, and whatever is left flash-rusts by morning. That one habit, the dishwasher for cast iron, is how most seasoning deaths start. It is also the easiest one to unlearn.
Mild dish soap is not the enemy the way old lye soap was, so do not treat it like poison. If the pan cooked fish and it smells, a drop of modern dish soap with the hot rinse is fine. What is not fine is soaking. Water sitting on seasoned iron is a rust factory, plain and simple. Keep the pan moving from rinse to dry, keep the water hot, and the seasoning stays right where it belongs.
Step 2: Dry It on the Burner, Not With a Towel
Here is the step almost everyone skips, and it is the one that separates the pan that lasts from the pan that rusts. After the rinse, set the skillet back on the burner, turn it to medium-low, and let the residual water steam off until you see bare dry iron. A paper towel can get most of it, but tap water hides in the grain of the seasoning and shows up as orange flecks by morning. That dry step costs you two minutes and saves you a reseasoning.
The burner dry also guarantees you store the pan fully dry. Somewhere in the back of every kitchen drawer sits a ruined pan that was dried with a dish towel and declared done. On a 12-inch, give it two to three minutes on low and you can feel the difference in your hand as the last moisture leaves. The pan comes off the burner warm and ready for the oil coat, which is exactly the state it should be stored in.
Do not walk away and come back to high heat. If you forget a cast iron skillet on a burner, it blows through the smoke point and leaves a sticky gray patch where the seasoning cooked away. Medium-low, dry it until the steam stops, and the step is done. It is five minutes at most, so stay near the stove and do something useful, like putting the plates out.
Step 3: Rub On a Whisper-Thin Coat of Oil
Seasoning is oil that gets polymerized by heat, meaning the oil molecules link up into a hard, plastic-like film. You are not greasing the pan. You are building a surface. The single biggest beginner mistake is too much oil. A bubbling, sticky coating means you painted it on like a muffin tin and the extra never cured into a layer. Less oil, more heat, and you get a smooth satin finish that releases food instead of grabbing it.
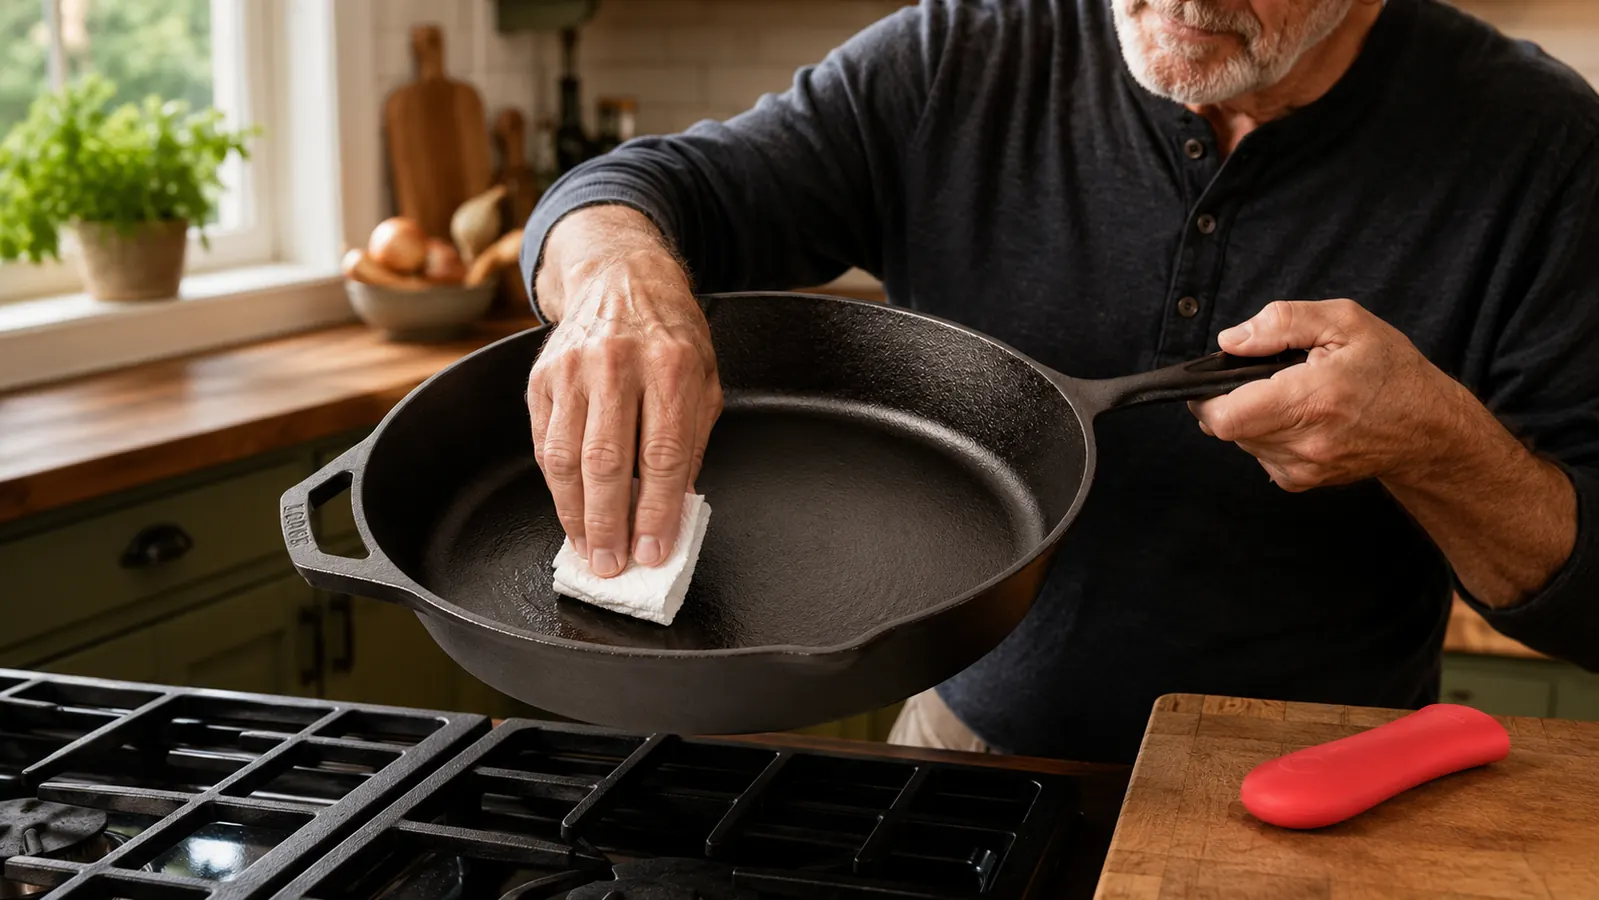
The application that works: fold a paper towel or use a lint-free cloth, put a teaspoon or less of oil in the cold pan, and rub it over the whole interior plus the rim. Then take a clean towel and wipe again like you are trying to remove every bit of oil you just put on. The faint sheen that remains is exactly the right amount. If your paper towel comes away with visible oil on it after the second wipe, there is too much left behind.
Which oil matters less than people claim, but pick one honestly. Grapeseed and canola polymerize well and cost little. Avocado has a very high smoke point if you want it. Skip the flaxseed oil that seasoning blogs push hard. It makes a brittle layer that flakes off in chips within months, and pans reseasoned with it end up looking like a peeled sunburn. A plain bottle of grapeseed from the grocery shelf does everything you need.

Step 4: Heat It Just Past the Smoke Point
The oven method is the reliable way to build a full seasoning. Put the pan in a cold oven, heat to 450°F, run it for one hour, then turn the oven off and leave the pan inside to cool. Do not pull a hot pan out and hit it with cold water. The temperature swing is how iron warps, and a warped skillet rocks on the burner and never cooks evenly again. Slow cooling in the oven lets the layer cure hard and uniform.
A brand new Lodge arrives pre-seasoned at the factory, and that factory layer is thin. Give it three or four full oven rounds before you trust it with eggs. I do my rounds on a Saturday and let the pan cycle while I do other things around the house. The payoff is a surface that releases fried eggs without you thinking about it, and that payoff is worth one lazy Saturday afternoon.
For a quick touch-up between cooks, the stovetop version does the same job faster. Wipe on the thinnest coat, heat the empty pan on medium until it just starts to smoke, about four minutes on a 12-inch, then wipe it again and let it cool on the burner. A wisp of smoke means polymerization is happening, which is what you want. A kitchen full of smoke means too much heat and too much oil, so back the heat down and use less next time.
Step 5: Fix the Three Common Failures, Rust, Sticky, Burned-On
If it rusts, and it will for almost everyone at least once, do not panic and do not sand it. Scrub the rust off with steel wool under warm water, dry it on the burner, then reseason with one or two oven rounds. Rust on cast iron is surface damage and it comes right back smooth. The pan is not ruined. That is the thing people do not believe until they have brought one back themselves, and it is the reason used cast iron is such a bargain.
If a spot turns sticky, that is extra oil that never polymerized. Burn it off by heating the pan empty until it lightly smokes, then let it cool and wipe it out. If it stays tacky, strip it and start over. Scrub with coarse salt and a little oil, or run the pan through the oven self-clean cycle, which reduces everything to bare gray iron you season from scratch. Either route ends with a pan that is good as new.
For burned-on gunk, the kind that laughs at scrubbing, fill the pan an inch deep with water, bring it to a boil on the stove, and scrape with the metal spatula. The boil loosens the carbon and the scrape lifts it. The seasoning underneath is fine. Cast iron is stubborn and forgiving at the same time. That balance is the entire reason to own it, and the reason one pan can serve three generations of cooks.
What Else Helps
Two accessories make this routine hardly worth calling a chore. A chainmail scrubber handles the stuck bits without touching the seasoning surface, and a flat metal spatula with a thin beveled edge gets under eggs and cornbread instead of stabbing them. The silicone handle holder that ships with the 12-inch Lodge is genuinely handy on the stovetop, but take it off before the pan goes in the oven. The sleeve is rated for stovetop heat, not for an hour inside a 450°F oven, and it will scorch if you leave it on.
And one honest tradeoff, because nobody says it up front. Cast iron does not heat evenly until it is fully hot. A 12-inch skillet is a lot of iron, near eight pounds of it, so it needs a full two minutes on medium before it is ready. You pay for that slowness with heat that holds when a cold steak hits the surface, which is exactly what a sear needs. If you want instant temperature response and do not need heat retention, my Lodge vs stainless steel comparison is the read for you. If you want one pan that does the heavy lifting for the next forty years, this routine and this skillet are the answer.
Skip the expensive seasoning kits and the specialty oils. Cheap canola or grapeseed, a stack of paper towels, and patience do everything the kits do. I have never bought a seasoning product in my life, because the ones I tried were performing a job the stove and a dollar bottle of oil already do better. If you already own the pan, the only thing you still need is the five-minute habit.
One more thing worth knowing: seasoning builds over time, and the first few months are the hump. A pan that has cooked fifty meals releases food far better than the same pan at meal ten. So do not judge the skillet by its first week. Judge it after a month of the routine, when the layer has had a chance to grow. That is the difference between people who love cast iron and people who gave up on it.
I have gone months between full reseasons on a 12-inch Lodge I use five nights a week. The oil coat stays thin, the pan never soaks, and the burner dries it every time. That simple loop, repeated every single cook, is the whole system working as intended.
Respect the layer and this pan is a buy-it-once kitchen tool that will be worth more to the next person who cooks with it than the box it arrived in. Ruin it once and now you know exactly how to bring it back, because rust is fixable and sticky is fixable. There is nothing precious about the routine. It is five minutes after dinner most nights, an hour on a weekend when you want a fresh start, and no dishwasher, not ever. That is the entire story.
If You're Buying Your First Cast Iron Skillet
Get the pre-seasoned 12-inch. It is heavy, it asks for five minutes of respect after every cook, and in return it will outlive every nonstick pan you have ever owned. There is no better way into the cast iron habit than this pan. Check today's price on Amazon.
Amazon Check Today's Price on Amazon →